Featured
Posted in Gratefulness

Shiny Objects and self reflection

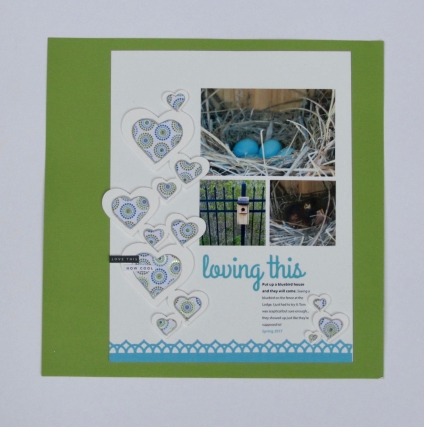
Today I am grateful for my children who continue to show me bits and pieces of myself.

One of my adult children, who shall remain nameless to protect the (mostly) innocent, has from an early age rushed life. Always in a  hurry for the next season. Rarely being present, his thoughts moving forward ahead of himself putting the proverbial cart before the horse. God love him, he comes by it honestly; inherited from his mother. 

For us consumers, it often seems as if the paper crafting world introduces new products and techniques at breakneck speed. We’re given little time to settle on our own personal niche of how we use our last purchase before new and shiny objects are dangled in front of our eyes on social media and blog sites. I know I’m not alone in the rabbit-hole free fall of new products and the many techniques that bombard us before we have the chance to focus. We make purchases before we even know how or why we want them, or (as most of us would agree is irrelevant) what we’re planning to do with them.

As many creative souls, not only am I a collector (hoarder is such a harsh word) of products (we want them all), I also collect techniques on product usage. I have the desire to learn everything I can about my new and improved purchases before I use them, though not necessarily before the actual purchase. It’s as if I’m afraid to use something incorrectly (not possible in a truly creative world). The research phase is so enticing I don’t get to the best part; playing with my new products, aka toys… (let’s be honest). Truly what’s more important is discovering all their capabilities and learning what we enjoy best about them.

Note to self:  take as much time to enjoy your new purchases as researching, purchasing, and organizing them. Quit getting ahead of yourself. Stop. Play. Live creatively in the moment. These shiny objects are not going anywhere. If they do, it’s because a newer, shinier object is on its way!!

Posted in Cards, Gratefulness

Love From Home

My first attempt at homemade Valentines.

For Valentine’s Day this year I decided to make my own cards. Hallmark can do it… how hard can it be? I was hoping my family would be forgiving. Or at least kind with their comments. (Insert wink here).

I’m still experimenting and learning with the Tim Holtz Distress Inks and really enjoying the play! I like the look created when using them with stencils and wanted to add the water element to see what I could do. The results were not disappointing.

fullsizeoutput_3f08
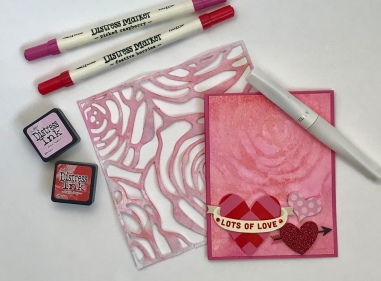
As my oldest son has a girlfriend I got to play with pinks and flowers…and glam, something I have little experience with as a mom of boys. I used a stencil on watercolor paper with distress inks in pinks and reds. A foam dauber was my go to tool to pick up the ink from a non-stick mat and apply over the rose stencil. After building up color to my satisfaction, I used a Tim Holtz spray bottle to mist the entire paper with the stencil still applied. After removing the stencil I used a heat gun to speed up the drying process (because I’m impatient) The color was great. Just as I’d hoped, but it needed a little oomph (I’m sure that’s a technical term). Clear Wink of Stella on the rose areas of the stencils was just the ticket.

fullsizeoutput_3f0a

After trimming the now dry decorated watercolor paper down to 4 X 5 1/4 inches I adhered it to a top folding standard card in red cardstock. A couple popped up decorated hearts at the bottom of the rose upped the glam level. I gave it just one more bit of sparkle (can you really have too much?) by adding some glaze to the lettering on one heart, and adhering a few red rhinestones and clear sequins.

The pink and red glam card was a great warm up, but what to do for a masculine Valentine card? Loving the stencil idea I used a more manly mandala style stencil with blue and purple distress inks instead of pinks. This time I added water to the inks on my mat before daubing onto the stencil which kept the colors a bit darker. The kraft hearts I wanted to use as embellishments had red on them and to tie that in I sprayed the finished mandala with a red glimmer mist (I’m using my stash). I trimmed my finished creation off-center and slightly smaller than the kraft base which allowed for greater variation and interest. It also left room for the kraft hearts adhered with pop dots. More masculine, but the love was still implied.fullsizeoutput_3f06 
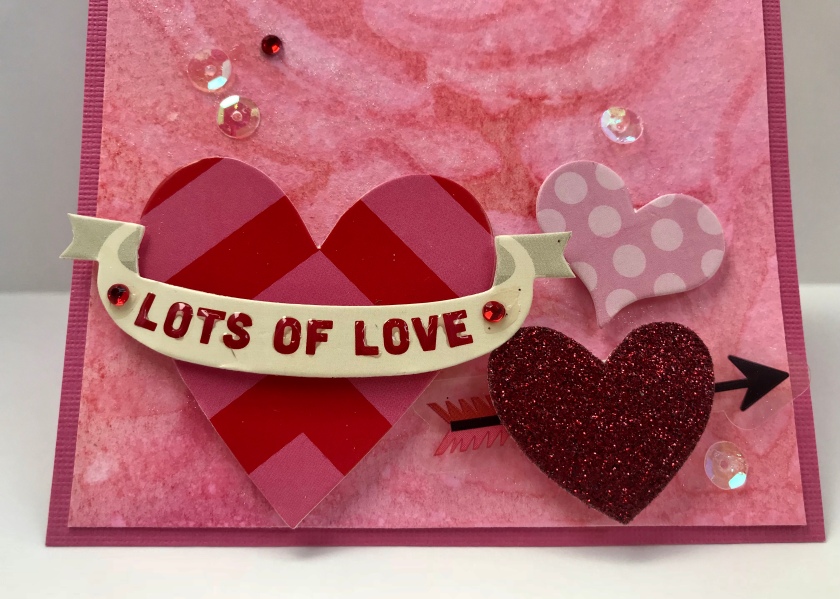
I did not tell my children the cards I sent were handmade by their mother, however, I heard from them all how impressed they were with my effort. A proud moment! It was either that, or the $20 bill I slipped inside! But still…Grateful for them AND their compliments. I’m one lucky momma!!!


Posted in Gratefulness

Valentine Cards for the Lesser Sex

Anyone else stumped on Valentine’s Day cards? 

With the exception of my female Golden Retriever Maggie, my mother, and Jason’s girlfriend, I am surrounded by men in my life.

OLYMPUS DIGITAL CAMERA
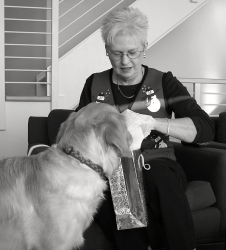
I typically do not send cards for Valentine’s Day. However, since I’m slowly climbing aboard the “card making” train I thought this would be a great chance to try my hand. Appropriate cards for men is much more of a creative challenge! At least for me. I certainly don’t want to create and send a romantic, or frilly, heart and lace pink card to my sons. Do I attempt funny and come up lame? The options seem so limited.

Then today, I ran into someone at the Y. Someone who has known me since… forever. A good friend of my family. He has always (and still does) tease me unmercifully. This morning, after the initial tease, he paid me a compliment. Meant a great deal coming from him. I don’t believe he hands compliments out without thought or sincerity.

This gave me an idea. A compliment is an indication that you have noticed and approve the words, actions, ideas, deeds of another person. In its most basic sense, it’s validation that they matter. What better way to show someone you love them?

Thanks Jack! Thanks for the compliment, and thanks for the idea. Today, I am grateful for you!

(Valentine card photos to follow)

Posted in Gratefulness

A Season of Thanksgiving

Who’s hands are these?

Spray bottle

In a recent post I displayed photos demonstrating a scrapbook technique which showed my hands. My first thought; “who’s old lady hands are those?” Somehow, at the end of my arms they don’t seem quite as wrinkly and age spotted as they do in print! As typically happens, God smacked me in the head with the reminder, I have two very useful hands, for which I should be grateful! This inspired me to reflect on some of the things my hands have done for myself and others.

These hands have served countless meals to my family, football pregame dinners, years of tailgate meals to fraternity men, and to patrons of the Lord’s Diner. These hands are the preferred petting hands to a beautiful golden retriever therapy dog who I take to read to elementary school children. These hands take photos, arrange florals, decorate, garden, preserve memories through scrapbooking, and teach scrapbook classes.

These hands have raised two awesome men, make cards for those who cannot get out to purchase them. They root on my favorite sports teams, hold books to read, and play piano.

These things are all very useful and important, but probably the most special thing about these hands is that they look almost exactly like my Grammy’s, some of the most special hands I’ve known!! They were the sweet hands of a grandmother’s touch. The hands that knitted all sorts of wonderful sweaters, hats, scarves, even fashionable clothes for my Barbies! These hands made fried chicken, rubbed my back, held me on her lap so I could share my secrets.

IMG_2525

This photo is my Grammy and me. I was around 3-4 years of age, she was approximately the same age I am now. Grammy lost a battle to cancer about 5 years after this photo was taken. Because my hands look so very much like my Grammy’s, they make me feel as though we are not so far from each other. Perhaps I shouldn’t view my hands as old and spotted. Maybe, they are more like little memories at the end of my arms I have with me at all times. Now that’s something to be grateful for!

IMG_2528

Posted in Scrapbook Layouts

What I’ve Been Doing…

Or why you haven’t heard from me in a few days…

My pile of projects got pushed aside by a deadline. A couple of deadlines, actually. I have been working on creations for designer submissions. This an area, though I have been scrapbooking for many years, I have never ventured into. I don’t know yet, where this will lead, or what the results will be, but it took me out of my comfort zone and stirred my creativity.

Today’s gratitude: you’re never too young or too old to learn new things about the world and yourself!!

So my point… jump off that cliff. You may not know where you will land, but the ride down might be fantastic and it could change your life!


Posted in Scrapbook Layouts

Seasonal Inspiration

Speaking of Fall…grateful for the awesome display of God’s beauty and bounty this season. Walking Maggie the other day we passed a pond on our regular route. The angle of the sun made dapples across the water which gave me an idea for a layout!!

In 2015 I made a layout for a class where I used ribbon as an embellishment for the negative space in a title.

Fall 2015

I’ve been playing around with distress markers and love the rich colors they can create. Perfect for a fall inspired layout! Using a Cricut I cut a title from kraft cardstock. It’s important to choose a font with fairly large open areas in the letters. I made my title to fit a 12″w X 4″h area.
Cricut title

Cut a piece of watercolor paper the slightly larger than your cardstock title piece. Choose several rich fall colored Distress Inks and, using the side of  the pen, color watercolor paper in random areas. Don’t make the colored areas too linear!

Side color
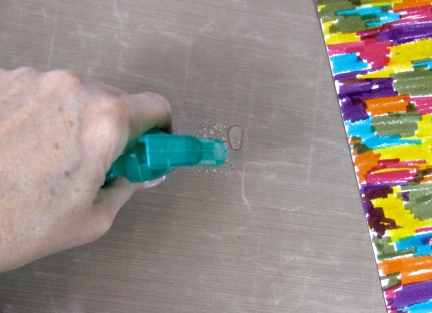
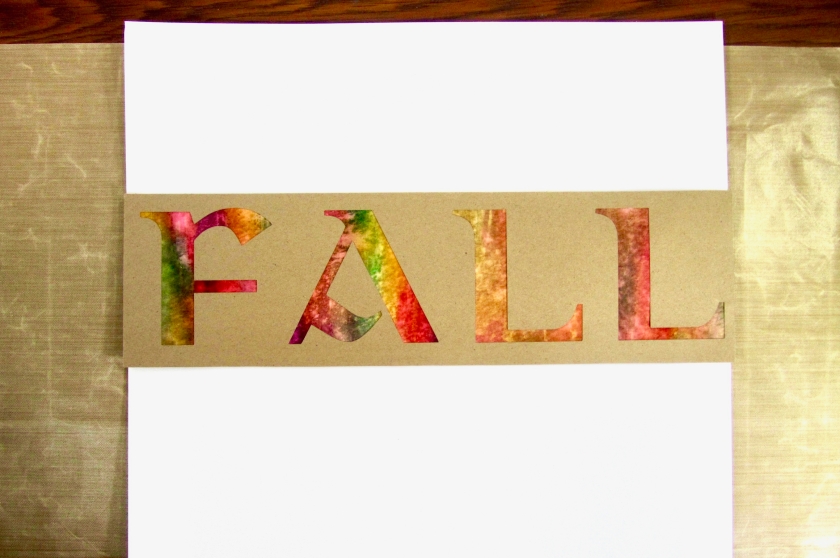
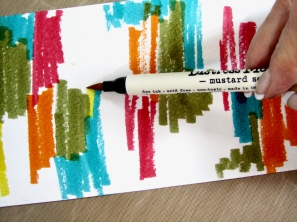
Leave some white areas showing. It will fill in when it’s painted. Fill the entire length of the water color paper.

Colored In


Now comes the fun!! You’ll need a 1″ wide paintbrush and a spray bottle. Lightly spray water on a couple of inches of the paper you just colored and use a paint brush to gently wash the water across the paper. Clean your brush on a dry paper towel every few strokes but don’t worry about the colors mottling, as it adds to the “fall” feel of the finished project.

Splatter spray

Allow to your paper to dry, or if you’re impatient like I am, use a heat gun to speed up the process. If the paper begins to curl, turn it over and heat from the backside. Next, use the spray bottle to lightly spray water on the mat next to your project so only a few tiny droplets land on your water colored paper. Then place a clean paper towel over painted paper and blot gently to absorb droplets which will result in small dappled areas. Again allow paper to dry or dry with a heat gun.

Adhere cut title to dry decorated paper and use paper trimmer to cut off any extra edges, if desired. Your project is now ready to use for your scrapbook title!

Finished project

This title now screams fall! Great for a hiking, biking, or Thanksgiving layout.

Until next time, it’s always a GREAT time to scrapbook!!

Posted in Florals

Fall Y’all!!

Hello Readers!

Today I am grateful for fall!! IMG_2245

Here in Kansas the leaves are finally beginning to change and the temps are finally beginning to drop below pool status. It’s also football season! That means lots of weekend trips to Manhattan, KS for Kansas State football games. Hubby Tom and I are both alums as are our two boys. The youngest just graduated last December. It’s a very busy season for us, but a season full of good food, good friends, and good times. We look forward to it with optimism and hopeful hearts every year!

The cooler weather and changing colors do nothing but inspire creativity. Being harvest time it’s a good reminder to appreciate foliage and natural elements. Is it possible to mix that with college spirit? You bet it is!!

IMG_1064 
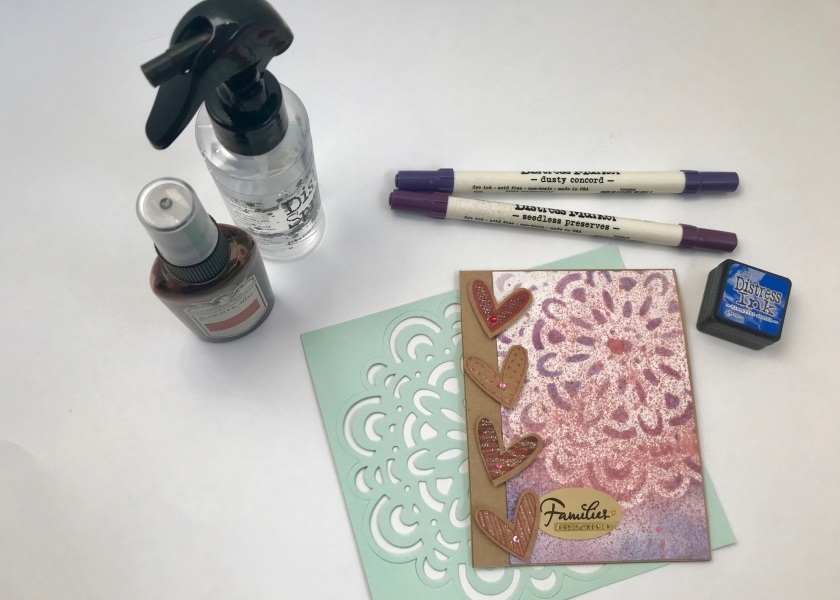
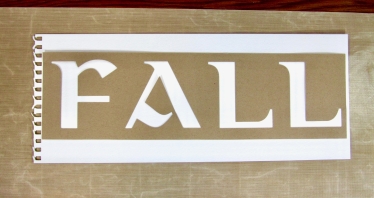
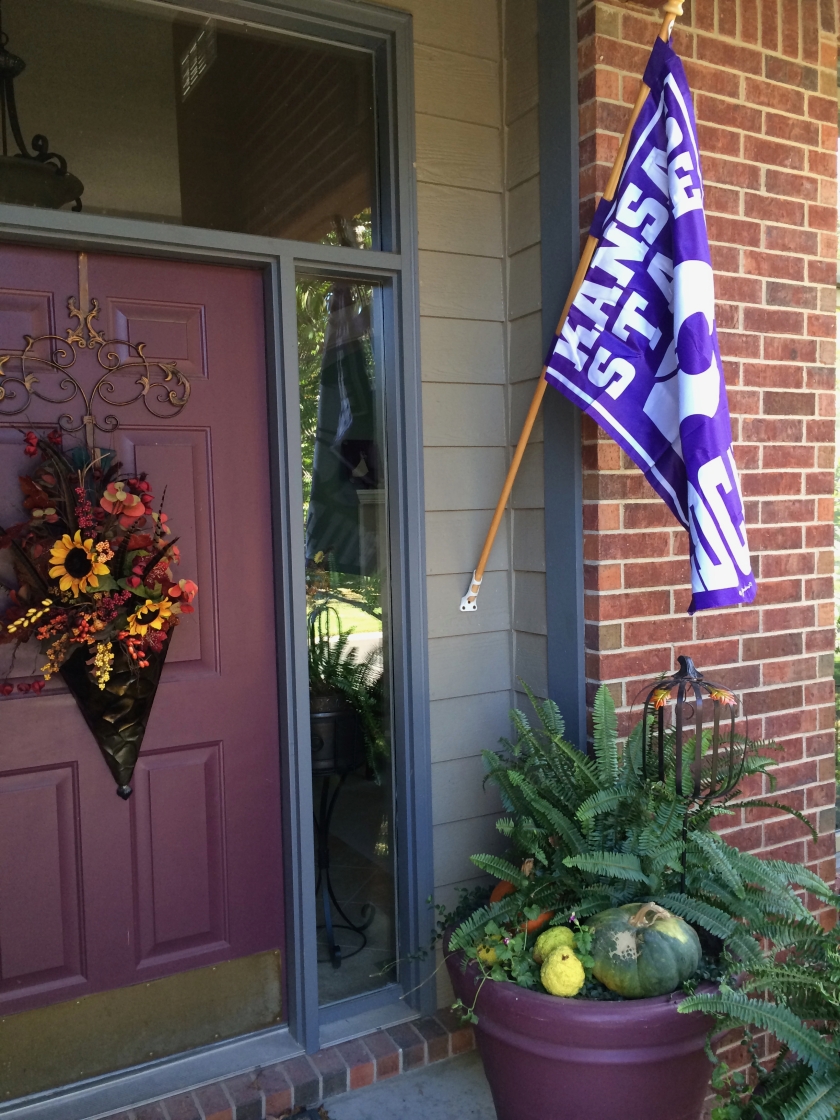
I made this door decoration a few years ago and add different things each year. I love the contrast to the door and the fall colors that mimic nature. As summer flowers grow leggy, I like to remove them and add pumpkins, gourds, and hedge apples which keep the crickets away (or so they say).

Let the harvest season and nature’s colors inspire your front porch! Fall marks the beginning of holiday entertaining. You’ll want to make a welcoming first impression! Then transfer those photos and gorgeous colors to your albums!

It’s always a GREAT day to scrapbook and Go Cats!!

Posted in Scrapbook Layouts

Class is in session…

Hello Readers,

I’d like to talk about scrapbooking inspiration. It comes in many forms; blogs, YouTube, publications, classes, Pinterest, websites, and conventions. Today I want to specifically discuss the inspiration that comes from other scrapbookers. I have a group of friends I’ve scrapbooked with twice a month for YEARS. Rarely, are we together that I don’t learn a tip, technique, or idea I can use on my own pages.

Recently, I took a class from one of my favorite scrapbook instructors Cathy Zielski. Though I am not as graphic in design, or hybrid as her style, I appreciate her penchant for simple scrapbooking and I tend to follow that philosophy on my own pages. It could be a result of scrapbooking life in a male-dominated family, or just that I’m not really much of a Foo-Foo kinda gal. This class was a repeat in topic of the class I had taken before, and though principles of design never change, technology, and products have, as did the layouts we did in class.

IMG_0515

This was a layout to demonstrate balance. I used one old and one new photo of my precious Maggie. I have lately been on a mission to pull out old products and use them… so old patterned paper (one of my favorites), an old button, and a date stamp I haven’t used in a while, but used in a new way.

IMG_0511

Again, with the old patterned paper and embellishments. Fairly new photos though, and the story is new. Stretching my use of doileys, and loving the color combination.

IMG_0509

This paper was fairly new, but old photos were used to tell the story I wanted to tell. Also used a new product on the title… that one needs more practice. It’s a process, right?

IMG_0505 IMG_0502

New photos, new story, new layout, and a reminder of the joy of using smaller photos on a layout.

IMG_0497

And a fun new way to use technology in cutting out these hearts with a downloaded file cut.

So my point… take a class and be inspired. Classes can be anywhere from pricey to free but they’re always an opportunity to learn something new. Even if you’ve taken the class before.

Until next time, It’s always a GREAT day to scrapbook!!


Posted in Scrapbook Layouts

Why I scrapbook

Hello Readers…

I believe our scrapbook pages do more than showcase our beloved pictures. They preserve a memory, creating their own place in our life’s history. Let me explain… when my youngest was an infant I received several small journals belonging to my great-grandmother which I read while nursing my son. The entries were fascinating snippets of her everyday life on a rural Tennessee farm. Included was information on the weather, how many eggs collected, what chores she did and how they were done. Noted were letters the postman brought twice each day, and the news they contained. G.G. listed each visitor, how long they stayed, births, marriages, illnesses, deaths. It was a journaled window into her life and times.

Three years later I was introduced to scrapbooking and decided my goal would be to document my own life and times. I’m fairly certain G.G. never thought anyone would read the journal entries she recorded every night, much less find them mesmerizing. So it is with my scrapbooking. I have two boys (formally known in this blog as NOS-Number One Son, and LA-Littlest Angel) who are now 26 and 24 respectively. I have been recording their lives for the last 21 years and rarely, do they pull a scrapbook off the shelf to flip through and travel down memory lane. That fact bothered me until I realized, I’m not scrapbooking for them at all. I scrapbook for me, and perhaps their children, grandchildren, or possibly great-grandchildren. I scrapbook so my own great-granddaughter may someday thrill to gaining a window into the life of a great-grandmother she may have never even met.

I also scrapbook for the creative outlet I discovered made life bearable years ago. Not to mention my girl tribe and support group I have been preserving memories with twice a month since before the millennium.

That’s the WHY…

The next plan is to show the HOW.  To explain some of my thought process, as well as, share some tips and tricks I’ve learned along the way and shared with my scrapbooking students.

To Be Continued…

Posted in Uncategorized

Seven Years

It’s been seven years…

since I’ve touched this blog. A lot has happened. Both my boys have graduated high school, college, and are living and working on their own. Other changes have also taken place. Cars have come and gone, home renovations have occurred, a house was added, as was hunting land. Moves were made, and made, and made. Family members have been added and lost. There have been surgeries, vacations, birthdays, anniversaries, and holidays. Good days, bad times, funerals, and celebrations. I began this blog as a way to record my migraines. In the process life and memories were documented, but then I stopped. Life got in the way.

Update: For the last nine months my migraines have become somewhat controlled. The journey has a story all its own, but feeling I have some of my life back I have decided to return to record happier things. I plan to turn this blog into a combined record of gratitude and creativity.

So… to begin; I am truly grateful to my neurologist who has been walking my migraine journey with me. It has been a process to be certain. I started Botox injections almost a year ago and it has been life changing. In my quest for migraine relief I learned there is unfortunately no cure. However, I now know my triggers and what medications work for me. My long-term goal is to reduce the amount of medications I take, but for now, I’m content with a reduced number and intensity of headaches.

In the matter of creativity… I have been scrapbooking for 21 years, teaching classes for 10. Perhaps it’s time to share the knowledge I’ve acquired with anyone content to read this blog. And it’s possible I will throw in some floral arranging, decorating, and plain old-fashioned crafting.

Grateful to have a new life much improved in the health department, I feel compelled to share something I love that makes me happy and that’s a creative life. Journey with me. As I tell my scrapbooking students, I promise to make it painless, and hopefully even fun!!

Photos